DIY Fishing Lights & Shrimp Light
Want to build your own DIY fishing lights and shrimp light?
The Academy Of Shrimping was built by networking other anglers in a safe friendly environment. We celebrated many years of networking since 2008 and let me share a DIY from one of our forum members, “Brian”.
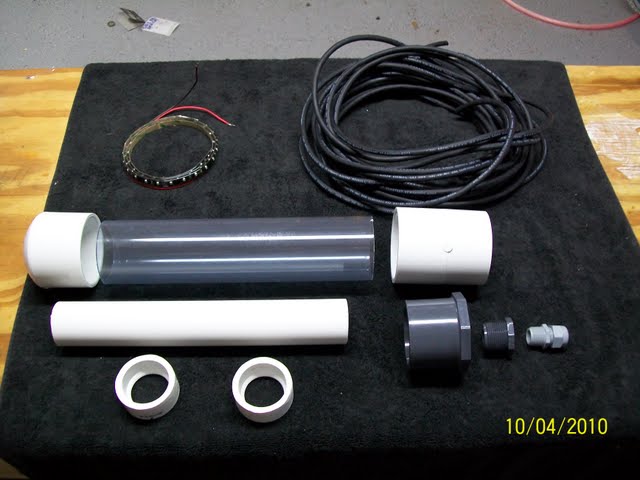
DIY Fishing Lighst & Shrimping Light Parts List:
- 1ea 2.5″ PVC White End Cap Sch40 (Florida Irrigation $3)
- 1ea 12″ x 2.5″ PVC Clear Pipe (Ryan Herco $90/10ft, $9 per ft)
- 2ea 2″to1.5″ PVC Bushing (Ace Hardware $2ea)
- 1ea 2.5″to1″NPT PVC Bushing (Ryan Herco $3)
- 1ea 1″to 1/2″ NPT PVC Bushing (Ryan Herco $1)
- 1ea 12″x1.5″ PVC White Sch40 Pipe (Ace Hardware $1)
- 1ea 2.5″ PVC Coupling (Florida Irrigation $3)
- 1ea Cable Grip with 1/2 NPT threaded end (Southern Electric $5)
- 40lf SJOW 2W 16/2 Bulk Cable (Ace Hardware $28)
- 1ea LED Green light strip 60 led’s, middle brightness (Superbrightleds.com $32)
DIY Fishing Lights Miscellaneous Parts
- 3m 5200 3oz (West Marine $12)
- Pipe glue and cleaner (Ace Hardware $12)
- Heat Shrink (Ace Hardware $3)
DIY Fishing Lights Prices NOT current: Research prices
- 2010 pricing – Total $195 (having to buy 10ft clear pipe and other bulk items)
- Now costs around $35 in 2014, can buy in smaller quantities
- Extract the build map, and source your own parts using Amazon etc.
- You can buy 2.5 in clear pvc at Grainger.com 12.95 for 3ft or 18.95 for 6ft
- You can buy 1 foot sections at FlexPvc.com
- People buy LED’s on ebay too
Let’s begin the DIY fishing lights & shrimping light build
- Glue on 1 end cap
- Construct center light support, grind down angular corners on outside bushings making outside round
- Ryan herco clear PVC has a blue hue to it, but does not appear to affect brightness
- You can click on these thumbnail pics to see larger size
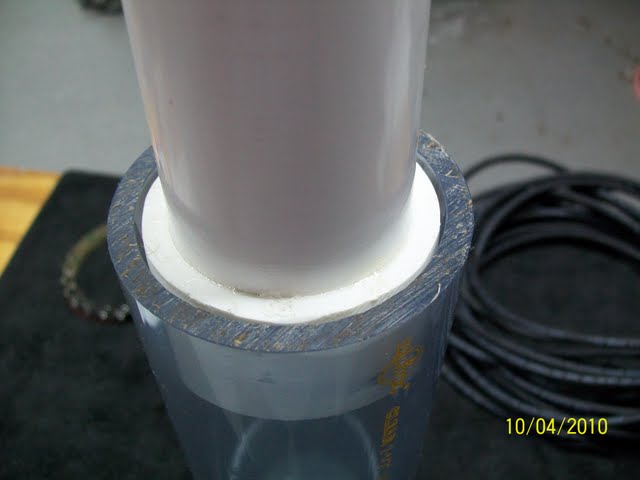
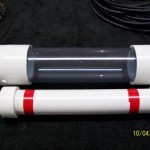
Note: By doing this, the outside diameter of the 2″x1.5″ bushing was just about a perfect fit for the inside of the 2.5″ clear pvc pipe. I glued one on each end.
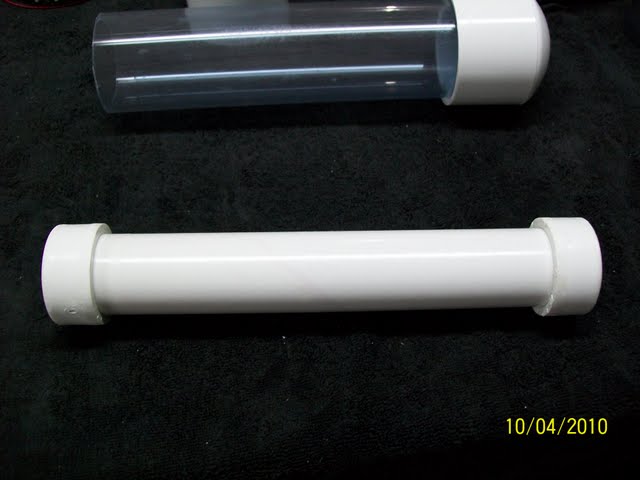
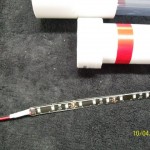
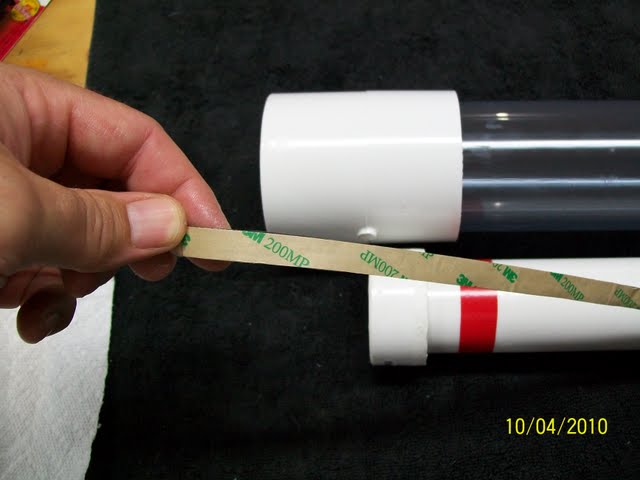
Here are a couple of shots showing how the smaller pipe fits within the larger clear pipe. Here I add the LED strip light to the inner pipe. I put some tape to mark the visible area on the inner pipe. Here is a shot of the LED light strip. Click on thumbnail pics to enlarge.


The LED light strip comes backed with a peel and stick backing. Here is a shot with the LED light strip installed and attached to as 12v power source.
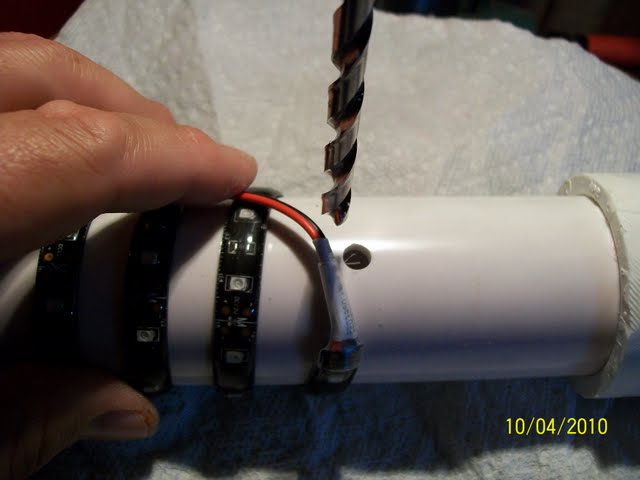
Here I drilled a hole for the wire to pass through. Although I don’t show it here, I did use 3M 5200 marine sealant through this penetration to seal it water tight. Here the inside 1.5″ pipe is re-installed in the clear pipe for a test fit.

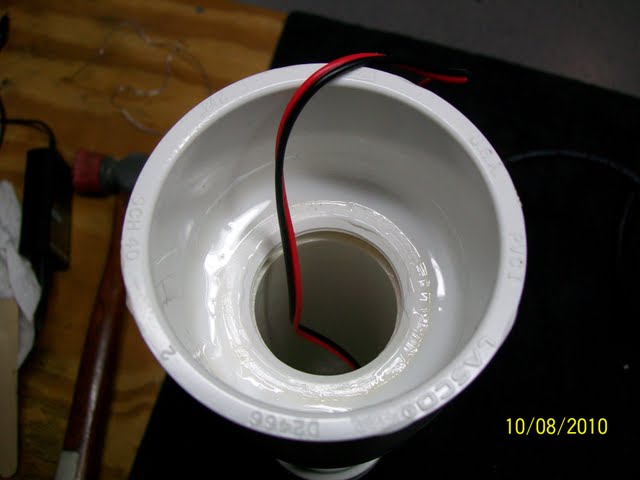
This next shot shows that I sealed the inner pipe to the outer pipe. Not shown here is the sealant on the other end. This creates a water tight chamber where the lights are in the event of a breech at the wire entry point at the cable grip.
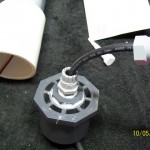
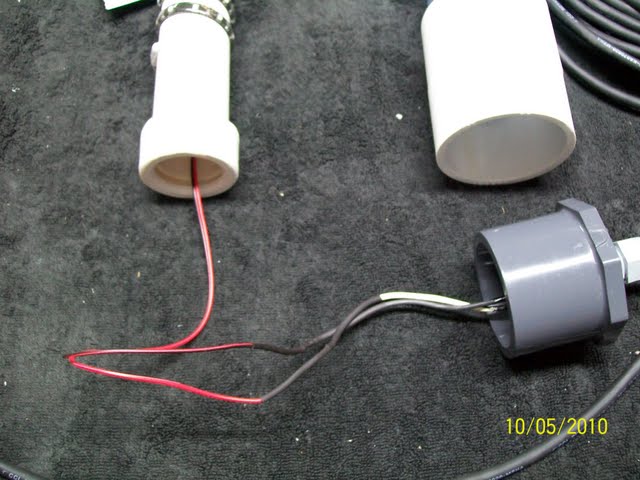
Here I assemble the end where the power cable will enter. A cable grip basically constricts around the cable and creates a water tight seal when the crown is screwed down….supposedly to 300ft. I sealed it with 5200 anyway. Both inside and out

Soldered the wires together and used heat shrink. This may seem out of order with a previous picture showing me sealing the interior pipe to the outer pipe. You would be right……mistakes happen the first go around.
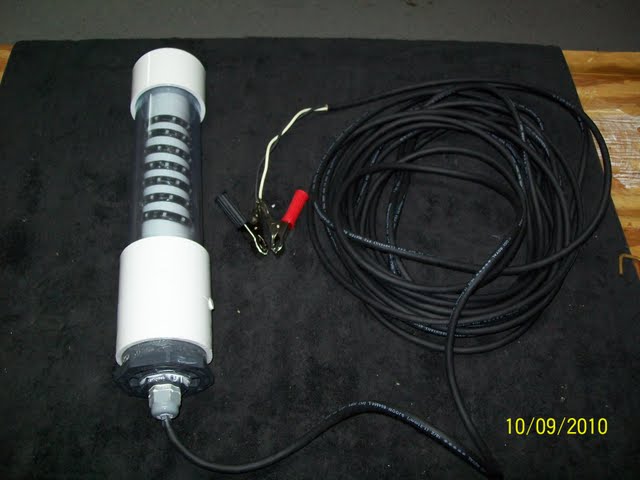
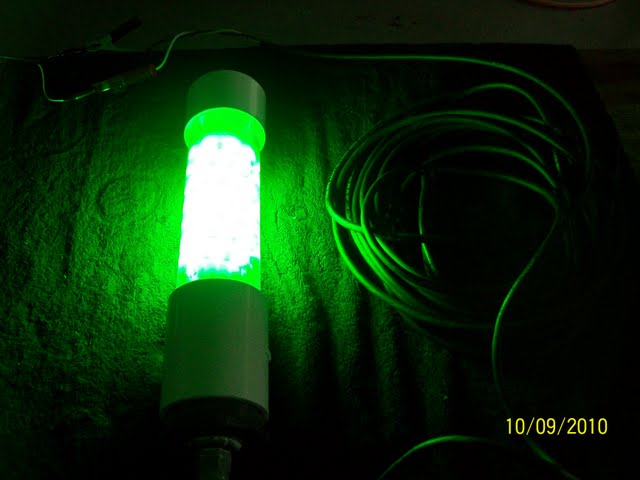
Finished Product –