Replacing Shrimping Dip Net Sock
You can do this! Replacing a dip net sock is very easy to do. Most all replacement socks fit both a adult 30″ and child 24″ dip net. We recommend you buy a dip net that YOU can replace the dip net sock. Some net builders use thread to make you feel you need to return back to them to maintain your equipment. This dip net sock replacement takes 20 minutes.
To purchase 7 foot custom made quick release shrimping dip net socks, call Ed Shumaker (386)566-9097 Ormond Beach, FL, Ron O’Brian (386)574-0386 Deltona, FL, Retail Vendors are American Hardware (386)345-0746 Edgewater Florida, Edgewater Bait Store (386)428-7711. Shrimping nets are seasonal (Nov-May), If you need custom nets made for fishing etc, Call Shumaker or O’Brian, they also sell retail as well out of their homes and have their work sold by vendors mentioned above.
Note: If your net had green or black thread look and see if the net is threaded on the black or green thread. If so, the rim of hoop may be to thick to accept a standard dip net replacement sock. Your only choice to is to thread on heavy line thru the sock loops and add numerous cable ties. When anglers purchase dip nets they do not understand what to look for and end up buying a net because of the pretty thread. As you will see, this pretty thread comes at a price. You lost your independence to replace the sock yourself.
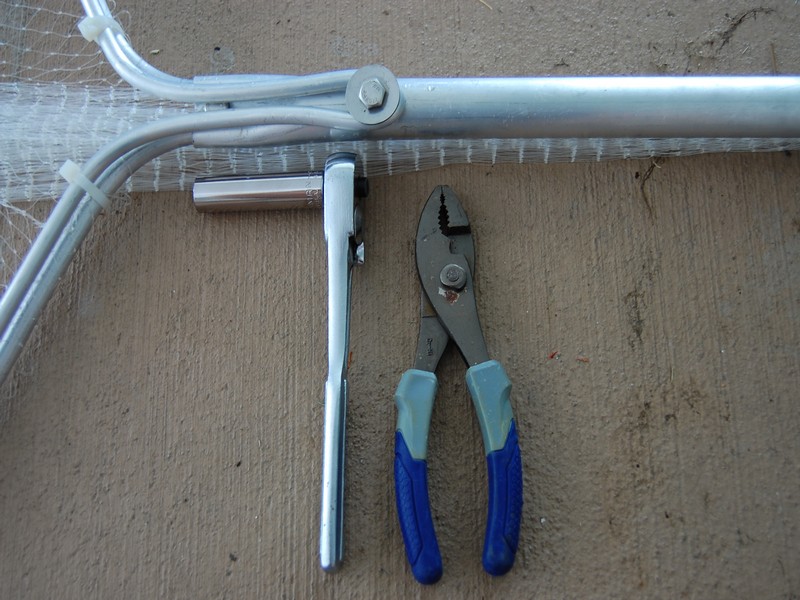
Tools Replace Dip Net, also grab 6 cable ties, and a wire cutter to trip off tails from cable ties. Marker69.com store.
TOOLS NEEDED: 7/16 socket or whatever size fits your bolt which holds the re-enforced bar to the frame & pair of pliers. Grab 6 cable ties and a wire cutter to remove the old cable ties as well as cut the tails off the new cable ties.
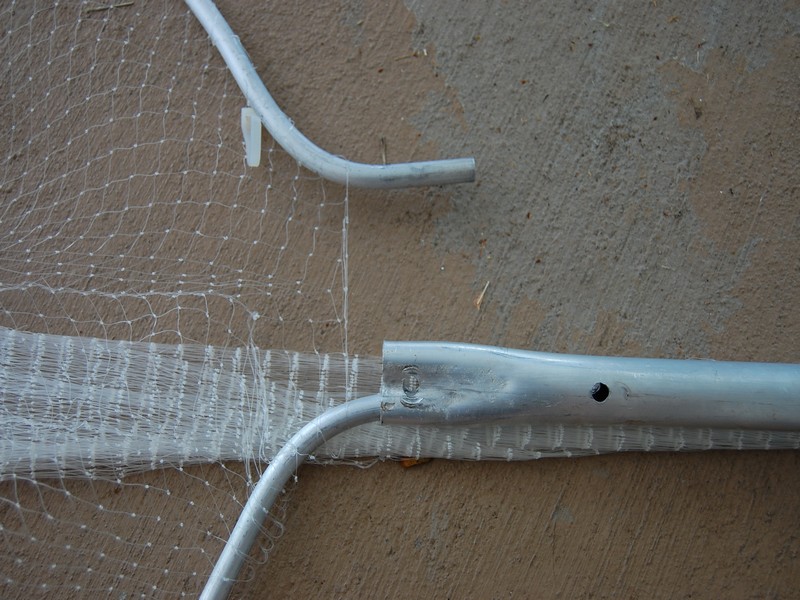
Step 2 – Pull out right leg if dip net is laying face up on surface.
Inside the aluminum handle you will find 2 feet which are the ends of the rim. You can see if they are hollow or solid. The best shrimping dip nets are made of solid material. The metal rim is 3/8″ thickness. Shrimping replacement socks are intended for 30″ round or 24″ round shrimp 3/8″ handled dip nets and NOT fishing retrieval nets (stubby 3 foot socks, blue, black) with 1/2″ frames. Cut away the old net if the old net is on the rim. Remove ALL mono from this rim before starting. You can choose to pull off the sock now that you have a foot exposed to get the net off. Either way, point is to remove the old sock.
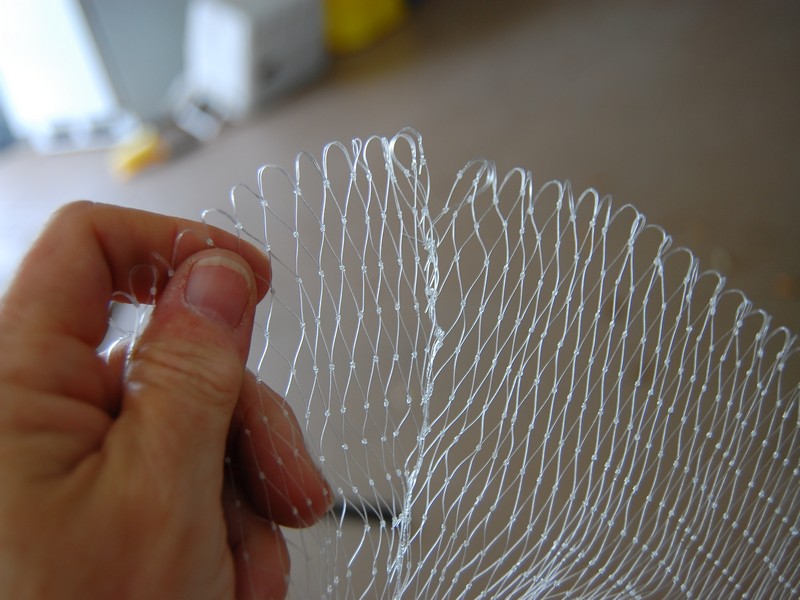
Locate the seam on net, count 4 loops to the right of the seam.
Step 3 – Now that the dip net frame is free of mono, grab your replacement sock and look for the seam, a linear line running the length of 7 foot sock. Put your left hand on the left side of the seam, and your right hand on the right side of the seam. From the seam, count 4 loops to the right and thread the 4th loop onto the dip net rim. Why 4th loop?? We want to take the stress off the seam with the pressure of the rim legs wanting to spread apart. Thread on your next loop, the pattern will be under-over-under-over or vice versa, you CANNOT make an error, the back and forth threading can only go on one way. Take your time and DO NOT miss any loops, if you should miss one or break a loop, keep going NO BIG DEAL.

Thread inch on at a time, and slide netting up rim & repeat until done.
NOTE- Once you have about an inch of dip net replacement sock threaded on the rim, put your thumb on the last loop you just added and hold it in place, take your left hand and slide the net up the rim. Repeat process. Thread on an 1″ of sock packed tight, and then pause and slide the net upwards, thread on another inch, pause and slide net around rim…this takes about 15 minutes to complete.
Leave 3 loops off rim and your done! Put foot back into handle and button up
Note – When you get down to the end of the net, you will need to squeeze the feet to take the tension off the last bit of net remaining. Stop when you have 3 loops left ( DO NOT THREAD these last 3 loops). You are done threading.
Place the metal foot back into the handle and bolt down if necessary.
Take your 6 cable ties and align the re-enforcement metal neck to the dip net rim and affix by threading thru a mono gap below rim. There are no loops, just thread cable tie thru the first area below the rim. Cut tails of the cable ties tight and close.
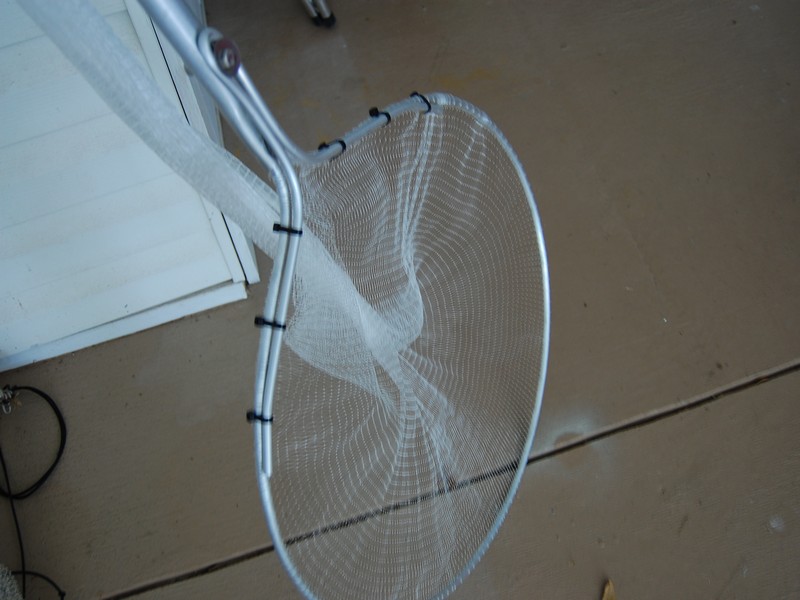
New shrimping dip net replacement sock finished. Sock purchased at Marker69.com
Your done. At the end of the season, you can remove the sock, soak in 50/50 fabric softener to water, and give it a 24 hour soak before drying it out with fabric softener on it and bagging. If you do not want to do this, get a spray bottle and 5 gallon bucket. Soak as much of the sock as you can in bucket and spray down heavy the net on the rim. Super saturate it and let dry.
To purchase 7 foot custom made quick release shrimping dip net socks, order on-line at Marker 69. You can call Capt Lee Noga at (386)479-4175. The nets cost $25 and that includes shipping. This is the sock used by Capt Lee Noga, Pro Angler. Ed Shumaker, net master for 45 years, top choice by consumers.